
Preparing Pencil Art for Digital Color
After you have scanned your pencil artwork and used a combination of Levels, Curves, and/or Brightness and Contrast to adjust the dark and light balance to your satisfaction, you can prepare it for direct digital color with no inking necessary. It must be in RGB color mode and preferably at least 300 dpi at whatever size you intend to print your finished illustration.
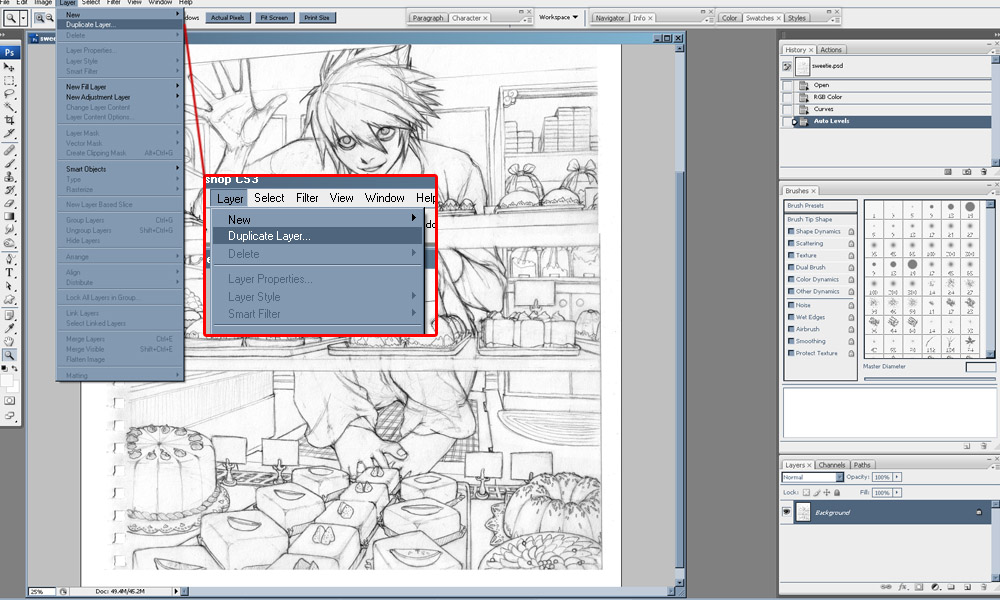
Step 1: Start with the drawing itself as the background then Layer > Duplicate Layer.
Step 2: Select > All the background layer then Edit > Clear it, making sure that you have pure white remaining as your background color.
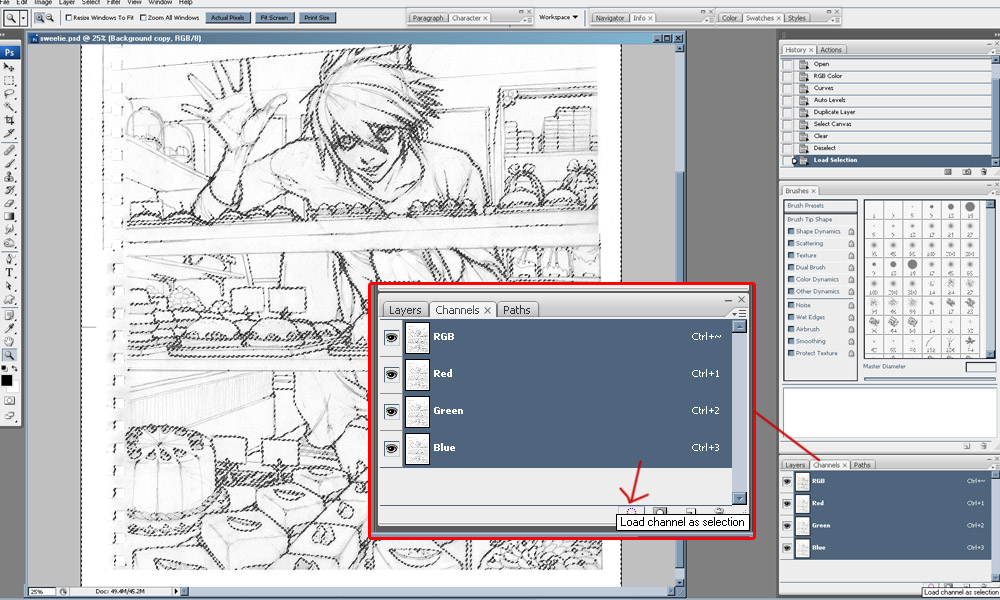
Step 3: Select your line work layer, then open the Channels Palette. Make sure that RGB is selected (all channels). At the bottom, the left-most icon is "Load channel as selection". Click it, which should select only the dark parts of your linework. Edit > Clear again.
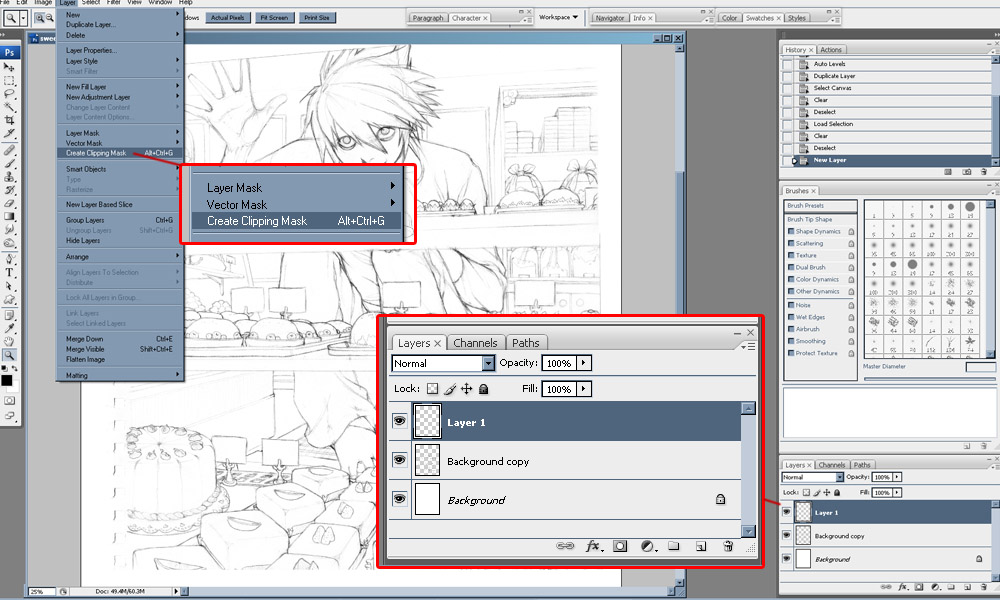
Step 4: Deselect the picture, return to the Layers Palette, and create a new layer by clicking "Create a new layer" in the Layers Palette or through the top menu with Layer > New > Layer above the linework. Make sure the new layer is highlighted in the Layers Palette. Continue by selecting Layer > Create Clipping Mask.
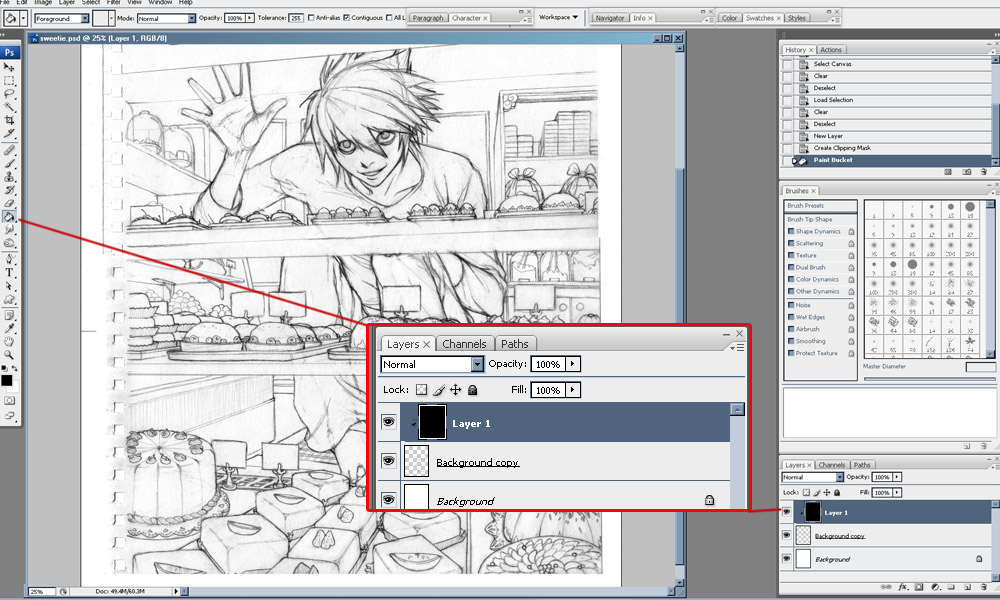
Step 5: Flood fill the layer with black, then Layer > Merge Down with the line art layer below.
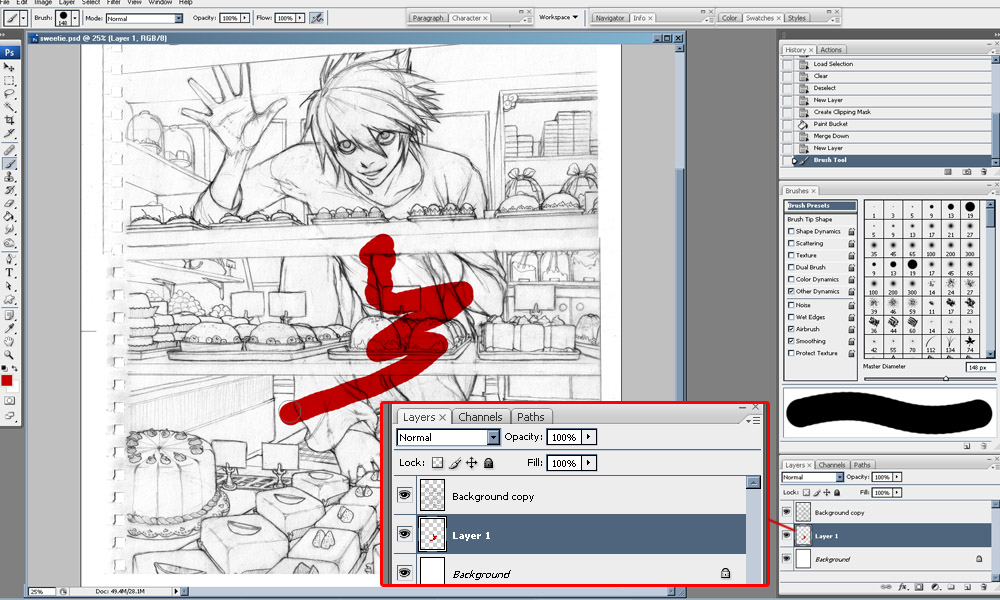
Step 6: Create a new layer under the lineart layer and paint using your preferred colors, brushes, and styles. Using multiple layers or groups of layers can be helpful.